I still remember the first time I tried to roll pasta with a toddler attached to my hip. The noodles came out thick on one end, paper-thin on the other, and I cried a little into the flour. Then my grandmother's old ruler showed up in a drawer, and everything changed – I finally had numbers to aim for instead of vibes.
Advertisements1
This noodle thickness chart is the cheat sheet I wish someone had handed me years ago. It maps out exactly how thick to roll dough for ramen, udon, tagliatelle, linguine, and dumpling wrappers, so you can stop guessing and start cooking with confidence. No fancy pasta machine required – just a rolling pin, a ruler, and this recipe.
Because here's the truth: noodle thickness is the difference between a sauce that clings and a sauce that slides right off. Get the numbers right, and even a simple garlic-butter toss tastes like a restaurant plate. Let's roll.
Why You'll Love This Recipe
About the Ingredients
3 cups (360g) all-purpose flour, plus extra for dusting
All-purpose gives a tender, forgiving noodle that is hard to ruin. For chewier, more restaurant-style noodles, swap in bread flour and add 1 extra tablespoon of water.
1 cup (240ml) warm water, about 110F (43C)
Warm water hydrates the flour faster than cold and makes the dough easier to knead. If your tap water runs very hot, let it cool for a minute so you do not kill the gluten before it forms.
1 teaspoon fine sea salt
Salt seasons the dough from the inside, which no amount of sauce can fix later. If you only have kosher salt, use 1 1/4 teaspoons since the flakes are larger.
1 tablespoon olive oil, plus more for coating
Oil keeps the dough supple and stops it from drying out while you roll. Any neutral oil works, but olive oil adds a faint peppery note that plays well with tomato sauces.
1/2 cup (60g) cornstarch, for dusting and rolling
Cornstarch is the secret to noodles that do not clump in the pot. If you are out, potato starch or tapioca starch works exactly the same way.
1 large egg, lightly beaten, optional for enriched dough
The egg makes a richer, golden noodle that holds up to heavy ragu. Skip it for vegan noodles and add 2 extra tablespoons of water instead.
1 teaspoon baking soda, optional for ramen-style bounce
A pinch of baking soda gives noodles that signature springy bite. You can leave it out entirely for a softer, more delicate noodle.
Tips & Tricks
Rest the Dough, Rest Yourself
Let the dough sit covered for 20 minutes before rolling. The gluten relaxes, the dough stops fighting back, and rolling becomes genuinely pleasant instead of a workout.
Flour Lightly, Dust Generously
Use cornstarch, not flour, for dusting the rolled sheets. Cornstarch absorbs moisture without turning gummy, which keeps your noodles separate in the boiling water.
Cut With Confidence
Use a sharp knife or pizza wheel and cut in one firm motion. Sawing back and forth creates ragged edges that catch and tear once they hit the pot.
- Measure Your Thickness, Not Your Feelings: Keep a ruler right next to your rolling pin and check the dough every few passes. Eyeballing it is how you end up with noodles that cook unevenly.
Pro Tips
Step-by-Step Instructions
1. Whisk the Dry Base
In a large bowl, whisk together the 3 cups (360g) flour, 1 teaspoon salt, and 1 teaspoon baking soda if using until evenly combined. This keeps the salt from pooling in one spot and giving you a salty bite later.
2. Add the Wet Ingredients
Make a well in the center and pour in 1 cup (240ml) warm water at 110F (43C), 1 tablespoon olive oil, and the beaten egg if using. Stir with a fork from the center outward until a shaggy dough forms, about 1 minute.
3. Knead Until Smooth
Turn the dough onto a lightly floured counter and knead for 8 to 10 minutes, until the surface is smooth and springs back when you press it. If it sticks, add flour 1 teaspoon at a time, never more.
4. Rest the Dough
Cover the dough with an inverted bowl and let it rest for 20 minutes at room temperature. This relaxes the gluten so the dough rolls thin without snapping back.
5. Roll to Target Thickness
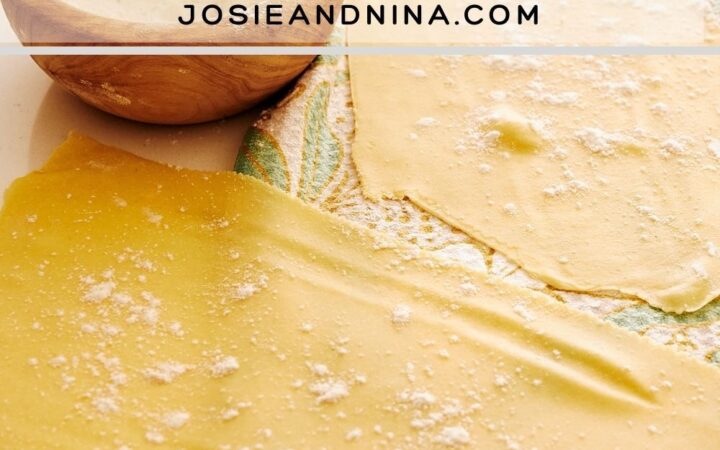
Divide the dough into 4 pieces and roll each one on a cornstarched surface, checking with a ruler as you go. Roll to 1mm (0.04 inch) for ramen and dumpling wrappers, 2mm (0.08 inch) for linguine and tagliatelle, or 3mm (0.12 inch) for udon.
6. Cut the Noodles
Dust the rolled sheet generously with cornstarch, fold it loosely into thirds, and cut into strips of your desired width with a sharp knife. Unfold the strips and toss gently with more cornstarch to coat.
7. Boil and Taste
Bring 4 quarts of water with 1 tablespoon salt to a rolling boil at 212F (100C). Cook fresh noodles for 2 to 3 minutes for thin cuts or 4 to 5 minutes for thick cuts, until they float and turn slightly translucent at the edges.
8. Sauce Immediately
Drain the noodles, reserving 1/2 cup of the starchy cooking water, and toss with your sauce right away. Add splashes of the reserved water until the sauce coats every strand and looks glossy, not watery.
Delicious Variations
Ramen-Style Springy Noodles
Roll to 1mm and add the baking soda to the dough for that bouncy, alkaline bite that loves a salty broth and a soft-boiled egg.
Herb-Infused Tagliatelle
Knead 2 tablespoons of finely chopped basil or parsley into the dough before resting, then roll to 2mm for a fragrant noodle that shines with brown butter.
Gluten-Free Rice Noodles
Swap the all-purpose flour for 2 1/2 cups white rice flour plus 1/2 cup tapioca starch, roll to 1.5mm, and cook for just 2 minutes since rice noodles soften fast.
How to Store Noodle Thickness Chart
Refrigerator
Toss cooked noodles with a teaspoon of oil, store in an airtight container, and refrigerate for up to 3 days. Uncooked fresh noodles keep the same way for 2 days.
Freezer
Form raw noodles into small nests, freeze on a tray for 1 hour, then transfer to a freezer bag for up to 2 months. Cook straight from frozen, adding 1 extra minute.
Reheating
Reheat cooked noodles in boiling water for 30 seconds or in a hot skillet with a splash of sauce. Avoid the microwave, which turns them rubbery and sad.
Frequently Asked Questions
Q: What is the best thickness for noodles?
The best thickness depends on the sauce: 1mm for ramen and dumpling wrappers, 2mm for linguine and tagliatelle, and 3mm for hearty udon. Thicker noodles hold heavier sauces, while thin noodles let delicate broths shine.
Q: How do I know if my noodle dough is too dry or too wet?
If the dough crumbles when you squeeze it, it is too dry and needs water 1 teaspoon at a time. If it sticks to your fingers and will not hold a shape, it is too wet and needs flour 1 teaspoon at a time.
Q: Can I make noodles without a pasta machine?
Yes, a rolling pin and a ruler work perfectly for homemade noodles. Roll from the center outward, rotate the dough a quarter turn after each pass, and check the thickness with your ruler before cutting.
Q: Why do my homemade noodles clump together in the pot?
Noodles clump when they are not dusted enough with cornstarch before boiling. Toss the cut strips with cornstarch until every strand feels dry and separate, and stir the pot gently during the first 30 seconds of cooking.
Q: How long do fresh homemade noodles take to cook?
Fresh noodles cook in 2 to 3 minutes for thin cuts and 4 to 5 minutes for thick cuts. They are done when they float to the surface and the edges look slightly translucent.
I would love to hear which noodle thickness you tried first and how your family reacted at the table. Snap a photo of your ruler next to your rolled dough, tag me, and let's celebrate the messy, delicious middle together. Parenting is a journey, not a perfection.

Noodle Thickness Chart
This noodle thickness chart turns a bag of flour and a rolling pin into silky, sauce-hugging noodles your whole family will cheer for tonight.
🧂 Ingredients
- 3 cups (360g) all-purpose flour, plus extra for dusting
- 1 cup (240ml) warm water, about 110F (43C)
- 1 teaspoon fine sea salt
- 1 tablespoon olive oil, plus more for coating
- 1/2 cup (60g) cornstarch, for dusting and rolling
- 1 large egg, lightly beaten, optional for enriched dough
- 1 teaspoon baking soda, optional for ramen-style bounce
📋 Instructions
- 1Whisk the Dry Base — In a large bowl, whisk together the 3 cups (360g) flour, 1 teaspoon salt, and 1 teaspoon baking soda if using until evenly combined. This keeps the salt from pooling in one spot and giving you a salty bite later.
- 2Add the Wet Ingredients — Make a well in the center and pour in 1 cup (240ml) warm water at 110F (43C), 1 tablespoon olive oil, and the beaten egg if using. Stir with a fork from the center outward until a shaggy dough forms, about 1 minute.
- 3Knead Until Smooth — Turn the dough onto a lightly floured counter and knead for 8 to 10 minutes, until the surface is smooth and springs back when you press it. If it sticks, add flour 1 teaspoon at a time, never more.
- 4Rest the Dough — Cover the dough with an inverted bowl and let it rest for 20 minutes at room temperature. This relaxes the gluten so the dough rolls thin without snapping back.
- 5Roll to Target Thickness — Divide the dough into 4 pieces and roll each one on a cornstarched surface, checking with a ruler as you go. Roll to 1mm (0.04 inch) for ramen and dumpling wrappers, 2mm (0.08 inch) for linguine and tagliatelle, or 3mm (0.12 inch) for udon.
- 6Cut the Noodles — Dust the rolled sheet generously with cornstarch, fold it loosely into thirds, and cut into strips of your desired width with a sharp knife. Unfold the strips and toss gently with more cornstarch to coat.
- 7Boil and Taste — Bring 4 quarts of water with 1 tablespoon salt to a rolling boil at 212F (100C). Cook fresh noodles for 2 to 3 minutes for thin cuts or 4 to 5 minutes for thick cuts, until they float and turn slightly translucent at the edges.
- 8Sauce Immediately — Drain the noodles, reserving 1/2 cup of the starchy cooking water, and toss with your sauce right away. Add splashes of the reserved water until the sauce coats every strand and looks glossy, not watery.

Aisha writes about parenting and child development, sharing insights from her own journey raising two kids. She offers realistic advice on navigating the ups and downs of family life, from tantrums to teen years.