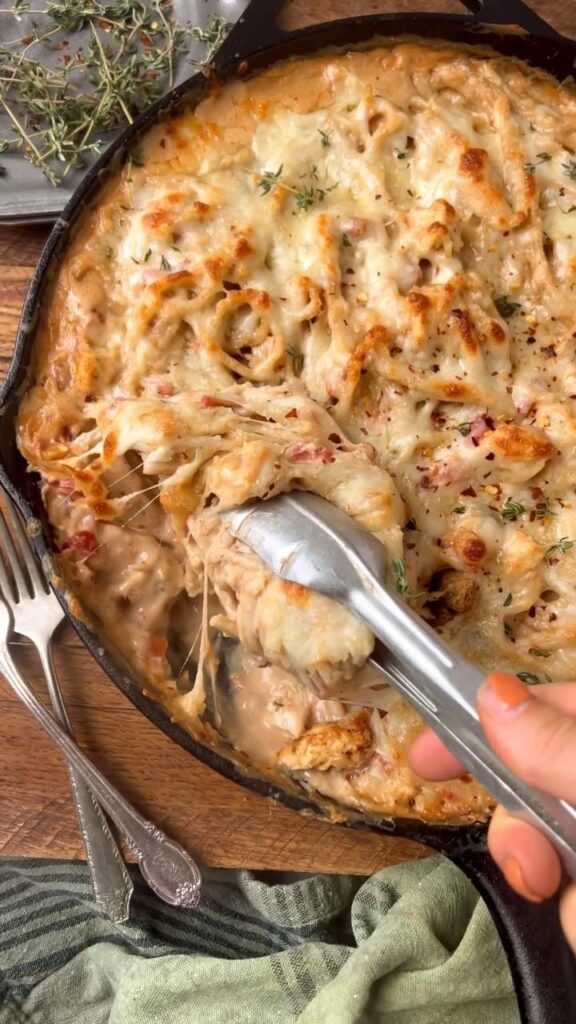
Welcome to my kitchen! Today, I'm excited to share my favorite weeknight lifesaver: this Cheesy Pasta Bake In Skillet. It's a hearty, comforting dish that comes together in one skillet, which means less cleanup and more time to relax.
Advertisements1
This recipe is perfect for those evenings when you crave something warm and cheesy but don't want to spend hours in the kitchen. With simple ingredients and straightforward steps, you'll have a delicious meal that the whole family will love.
I've included tips and tricks to ensure your pasta bake turns out perfectly every time, from choosing the right skillet to getting that golden, bubbly cheese topping. Let's get cooking!
Why You'll Love This Recipe
About the Ingredients
12 oz (340g) short pasta (e.g., penne, rotini)
Any short pasta works well. Use whole wheat or gluten-free if preferred.
2 tbsp (28g) unsalted butter
Adds richness. You can substitute with olive oil for a lighter flavor.
2 tbsp (16g) all-purpose flour
Used to thicken the sauce. Gluten-free flour blends work too.
2 cups (480ml) whole milk
Whole milk gives the creamiest sauce. Use 2% or skim for a lighter version.
1 cup (240ml) chicken or vegetable broth
Enhances flavor. Use low-sodium to control salt.
2 cups (200g) shredded sharp cheddar cheese
Sharp cheddar adds bold flavor. Mix in mozzarella or Monterey Jack for extra melt.
1/2 cup (50g) grated Parmesan cheese
Adds a nutty, salty kick. Freshly grated is best.
1 tsp garlic powder
For savory depth. Substitute with 2 cloves minced garlic.
1/2 tsp salt
Adjust to taste. Consider the saltiness of your broth and cheese.
1/4 tsp black pepper
Freshly ground for best flavor.
1/2 cup (50g) breadcrumbs (optional)
Adds a crispy topping. Panko breadcrumbs work great.
Tips & Tricks
Don't overcook the pasta
Cook it just shy of al dente because it will continue cooking in the sauce and in the oven.
Shred your own cheese
Pre-shredded cheese often contains anti-caking agents that can make the sauce grainy. Shredding fresh cheese ensures a smooth, creamy sauce.
Use a well-seasoned skillet
If using cast iron, make sure it's well-seasoned to prevent sticking. Alternatively, use a non-stick skillet.
Pro Tips
Step-by-Step Instructions
1. Preheat and prep
Preheat your oven to 375°F (190°C). Grease a 10-inch oven-safe skillet with butter or cooking spray.
2. Cook the pasta
Bring a large pot of salted water to a boil and cook the pasta until just shy of al dente (about 2 minutes less than package directions). Drain and set aside.
3. Make the sauce
In the same skillet, melt the butter over medium heat. Whisk in the flour and cook for 1 minute until golden. Gradually whisk in the milk and broth, stirring constantly until the mixture thickens, about 5 minutes.
4. Add the cheese
Reduce heat to low and stir in the cheddar and Parmesan until melted and smooth. Season with garlic powder, salt, and pepper.
5. Combine pasta and sauce
Add the cooked pasta to the skillet and toss to coat evenly in the cheese sauce.
6. Top with breadcrumbs
If using, sprinkle breadcrumbs evenly over the top.
7. Bake until bubbly
Transfer the skillet to the oven and bake for 15-20 minutes, or until the edges are bubbling and the top is golden brown. If you want a crispier top, broil for the last 2-3 minutes.
8. Rest and serve
Remove from the oven and let it rest for 5 minutes before serving. Enjoy!
Delicious Variations
- Add cooked bacon or ham for a smoky, salty twist.
- Stir in steamed broccoli or peas for a pop of color and nutrition.
- Use a blend of cheeses like gouda, fontina, or smoked cheddar for a different flavor profile.
How to Store Cheesy Pasta Bake In Skillet
Refrigerator
Store leftovers in an airtight container in the refrigerator for up to 4 days.
Freezer
Freeze in a freezer-safe container for up to 3 months. Thaw overnight in the fridge before reheating.
Reheating
Reheat in the microwave or in a 350°F (175°C) oven until heated through.
Frequently Asked Questions
Q: Can I make this pasta bake ahead of time?
Yes, you can assemble the dish up to a day in advance and refrigerate it. Just add a few extra minutes to the baking time to ensure it's heated through.
Q: What can I use instead of heavy cream?
You can use whole milk or a combination of milk and a little butter for richness. For a dairy-free option, use unsweetened almond or oat milk.
Q: How do I prevent the cheese sauce from becoming grainy?
To prevent a grainy sauce, always use freshly grated cheese and avoid overheating. Add the cheese over low heat and stir until just melted.
Q: Can I add meat to this dish?
Absolutely! Cooked ground beef, Italian sausage, or shredded chicken are great additions. Just stir them in before baking.
Q: What if I don't have an oven-safe skillet?
You can transfer the mixture to a buttered baking dish before baking. Just adjust the baking time accordingly.
I hope you enjoy this Cheesy Pasta Bake In Skillet as much as we do! If you try it, let me know in the comments below – I'd love to hear how it turned out. Happy cooking!
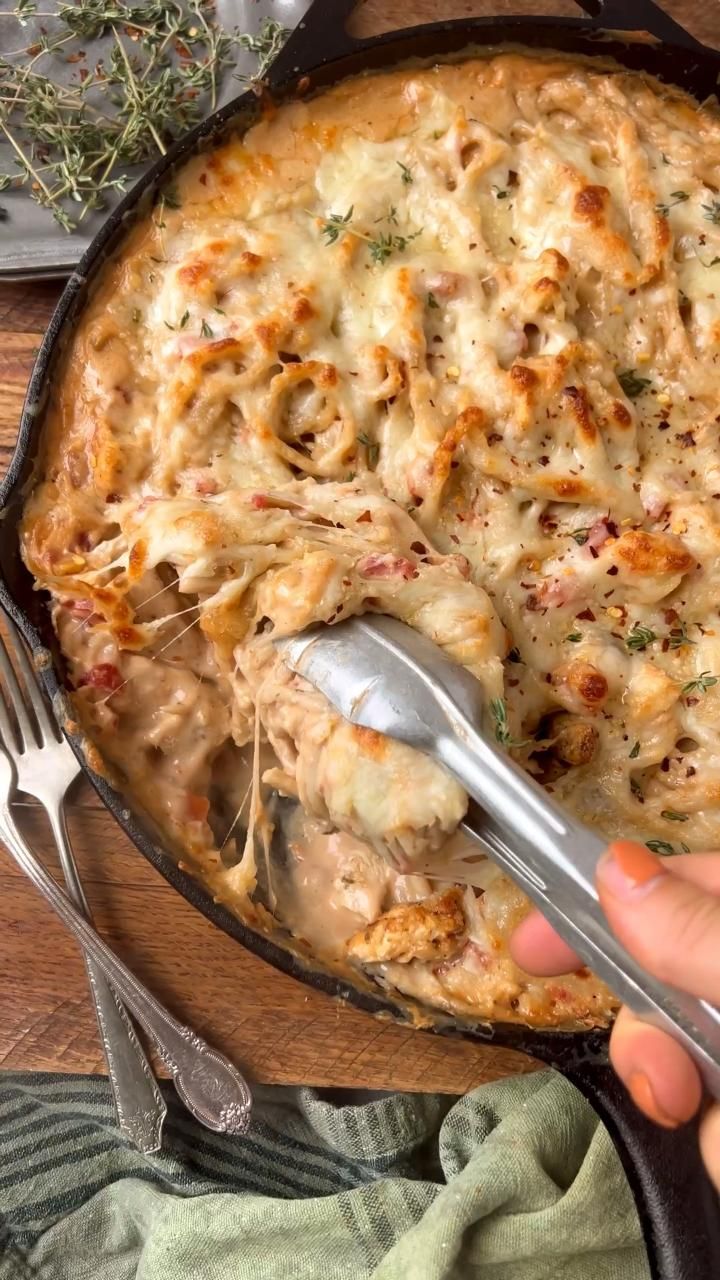
Cheesy Pasta Bake In Skillet
This one-pan cheesy pasta bake is creamy, bubbling, and ready in 30 minutes – perfect for busy weeknights.
🧂 Ingredients
- 12 oz (340g) short pasta (e.g., penne, rotini)
- 2 tbsp (28g) unsalted butter
- 2 tbsp (16g) all-purpose flour
- 2 cups (480ml) whole milk
- 1 cup (240ml) chicken or vegetable broth
- 2 cups (200g) shredded sharp cheddar cheese
- 1/2 cup (50g) grated Parmesan cheese
- 1 tsp garlic powder
- 1/2 tsp salt
- 1/4 tsp black pepper
- 1/2 cup (50g) breadcrumbs (optional)
📋 Instructions
- 1Preheat and prep — Preheat your oven to 375°F (190°C). Grease a 10-inch oven-safe skillet with butter or cooking spray.
- 2Cook the pasta — Bring a large pot of salted water to a boil and cook the pasta until just shy of al dente (about 2 minutes less than package directions). Drain and set aside.
- 3Make the sauce — In the same skillet, melt the butter over medium heat. Whisk in the flour and cook for 1 minute until golden. Gradually whisk in the milk and broth, stirring constantly until the mixture thickens, about 5 minutes.
- 4Add the cheese — Reduce heat to low and stir in the cheddar and Parmesan until melted and smooth. Season with garlic powder, salt, and pepper.
- 5Combine pasta and sauce — Add the cooked pasta to the skillet and toss to coat evenly in the cheese sauce.
- 6Top with breadcrumbs — If using, sprinkle breadcrumbs evenly over the top.
- 7Bake until bubbly — Transfer the skillet to the oven and bake for 15-20 minutes, or until the edges are bubbling and the top is golden brown. If you want a crispier top, broil for the last 2-3 minutes.
- 8Rest and serve — Remove from the oven and let it rest for 5 minutes before serving. Enjoy!

Maya writes about sustainable living and urban gardening, focusing on practical tips for small spaces. She experiments with DIY projects and shares what works in her own apartment.